language
English
العربية
বাংলাদেশ
Български
Hrvatski
Česky
Dansk
Nederland
 Esperanto
Slovenski
Filipino
Suomi
Français
Maori
 Shqiptare
Georgian
 Euskara
Deutsch
Ελλάδα
ישראל
इंडिया
Magyarország
Ísland
Indonesia
Irlanda
Italia
日本語
Sovensko
Հայաստան
한국
Kyrgyz
ປະເທດລາວ
 Zulu
Latvian
Lithuanian
Luxembourgish
 Latinus
Macedonian
Малайская
Maltese
Монгол улс
 Cymraeg
ဗမာ
 தமிழ்
नेपाल
Norge
ایران
Polska
Portugal
România
Российская
Србија
 Slovak
Србија
 Slovak
Bosanski
Slovenian
Беларус
España
Sverige
Точик
ประเทศไทย
Türk
Azərbaycan
Uzbek
 Afrikaans
Việt Nam

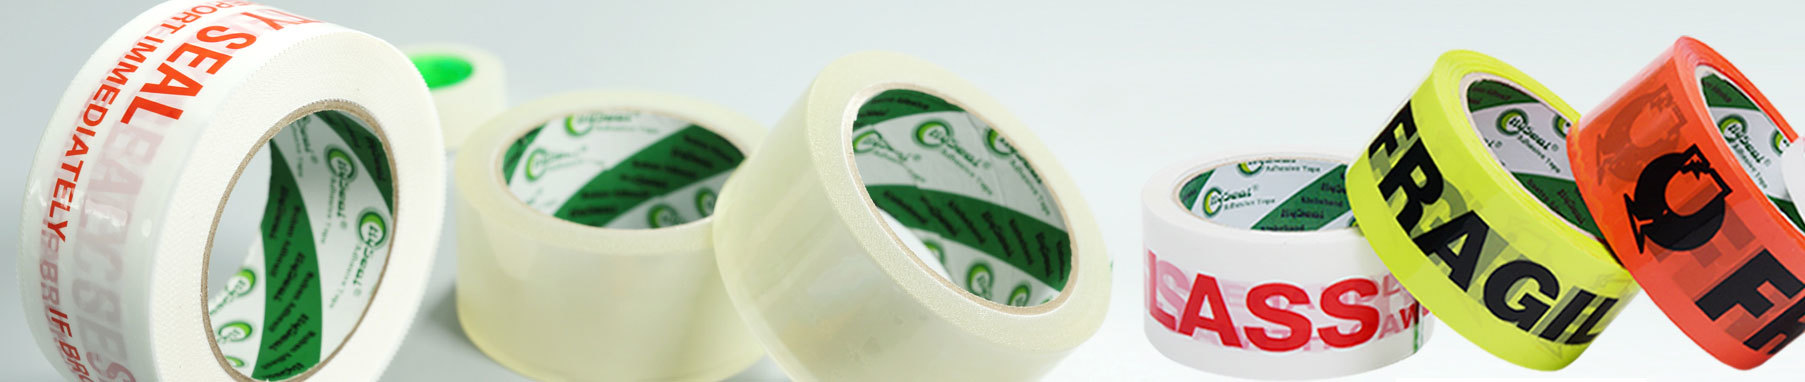
How to Make Your Own Printable Tape: A Step-by-Step Guide
Table of Contents:
1. Introduction
2. Materials Needed
3. Step 1: Designing Your Printable Tape
4. Step 2: Printing Your Designs
5. Step 3: Preparing the Tape
6. Step 4: Applying the Designs to the Tape
7. Step 5: Drying and Storing Your Printable Tape
8. Creative Uses for Printable Tape
9. Frequently Asked Questions (FAQs)
10. Conclusion
Welcome to our step-by-step guide on how to make your own printable tape! In this article, we will walk you through the process of creating custom tape designs that you can print at home. With just a few materials and some creativity, you can add a personal touch to your crafts, gifts, and packages. Let's get started!
Before we dive into the process, let's gather all the necessary materials:
- Clear tape: Choose a transparent tape that is suitable for printing.
- Printer: You will need a printer that allows you to print on adhesive materials.
- Design software: Use graphic design software or online tools to create your tape designs.
- Computer or mobile device: Depending on your chosen design software, you may need a computer or mobile device to create your designs.
- Ink or toner: Ensure you have enough ink or toner for your printer.
- Scissors: You may need scissors to trim the tape after printing.
- Optional: Colored markers or pens for additional customization.
Now that you have everything ready, let's move on to the step-by-step process of making your own printable tape.
The first step is to create your custom tape designs. Open your preferred design software or use an online tool to unleash your creativity. Consider the color scheme, patterns, and any text or images you want to include. Remember to keep the dimensions of the tape in mind while designing.
Use vibrant colors and eye-catching graphics to make your tape designs stand out. Experiment with different fonts and typography styles to add a unique touch to your creations.
Once you are satisfied with your tape designs, it's time to print them. Load the clear tape into your printer, ensuring it is positioned correctly for printing on the adhesive side. Adjust the printer settings to accommodate the tape's dimensions and select the highest quality print option for optimal results.
To avoid smudging or smearing, allow the printed tape to dry completely before handling it.
Before applying the designs to the tape, make sure the surface is clean and free from any dust or debris. Gently wipe the tape with a clean cloth or tissue to remove any potential obstructions that could affect the adhesion of the ink.
To ensure the longevity of your printable tape, consider using a tape dispenser or storing it in a cool, dry place away from direct sunlight.
Carefully peel off the backing from the printed tape, exposing the adhesive side. Align the designs with the desired placement on the tape and press them firmly onto the adhesive surface. Smooth out any air bubbles or wrinkles by gently applying pressure from the center towards the edges.
For intricate designs, use a small tool like a bone folder or the edge of a credit card to ensure precise application.
Allow the printed tape to dry completely before using or storing it. This will ensure that the ink sets properly and prevents any potential smudging. Once dry, roll or fold the tape carefully to avoid any damage, and store it in a safe place until you're ready to use it.
Now that you have your own printable tape, let's explore some creative ways to use it:
- Gift wrapping: Add a personal touch to your gifts by using your custom tape to seal the wrapping paper or embellish the package.
- Scrapbooking: Use your printable tape as decorative borders or to secure photos in your scrapbook.
- DIY crafts: Incorporate your unique tape designs into various craft projects, such as handmade cards, journals, or home décor.
- Party decorations: Create custom banners, signs, or labels using your printable tape for birthdays, weddings, or other special occasions.
- Branding and packaging: If you have a small business, you can use your printable tape to add a professional and personalized touch to your product packaging.
Yes, but it is recommended to choose a transparent tape specifically designed for printing to ensure optimal quality and adhesion.
Yes, as long as your printer allows you to print on adhesive materials and accommodates the dimensions of the tape.
Absolutely! Use colored markers or pens to add additional details, highlights, or personal messages to your printed tape.
Drying time can vary depending on factors like ink type and humidity. It is best to allow the tape to dry for at least a few hours before handling it.
While some tapes can be removed without leaving residue, others may adhere more firmly. It is recommended to test a small piece before applying the tape to a valuable item.
Congratulations! You now have the knowledge and skills to create your own printable tape. With this step-by-step guide, you can unleash your creativity and add a personal touch to various projects. Whether it's for gifts, crafts, or branding, your custom tape designs will undoubtedly make a lasting impression. Get started today and enjoy the endless possibilities of printable tape!
1. Introduction
2. Materials Needed
3. Step 1: Designing Your Printable Tape
4. Step 2: Printing Your Designs
5. Step 3: Preparing the Tape
6. Step 4: Applying the Designs to the Tape
7. Step 5: Drying and Storing Your Printable Tape
8. Creative Uses for Printable Tape
9. Frequently Asked Questions (FAQs)
10. Conclusion
1. Introduction
Welcome to our step-by-step guide on how to make your own printable tape! In this article, we will walk you through the process of creating custom tape designs that you can print at home. With just a few materials and some creativity, you can add a personal touch to your crafts, gifts, and packages. Let's get started!
2. Materials Needed
Before we dive into the process, let's gather all the necessary materials:
- Clear tape: Choose a transparent tape that is suitable for printing.
- Printer: You will need a printer that allows you to print on adhesive materials.
- Design software: Use graphic design software or online tools to create your tape designs.
- Computer or mobile device: Depending on your chosen design software, you may need a computer or mobile device to create your designs.
- Ink or toner: Ensure you have enough ink or toner for your printer.
- Scissors: You may need scissors to trim the tape after printing.
- Optional: Colored markers or pens for additional customization.
Now that you have everything ready, let's move on to the step-by-step process of making your own printable tape.
3. Step 1: Designing Your Printable Tape
The first step is to create your custom tape designs. Open your preferred design software or use an online tool to unleash your creativity. Consider the color scheme, patterns, and any text or images you want to include. Remember to keep the dimensions of the tape in mind while designing.
Design Tip:
Use vibrant colors and eye-catching graphics to make your tape designs stand out. Experiment with different fonts and typography styles to add a unique touch to your creations.
4. Step 2: Printing Your Designs
Once you are satisfied with your tape designs, it's time to print them. Load the clear tape into your printer, ensuring it is positioned correctly for printing on the adhesive side. Adjust the printer settings to accommodate the tape's dimensions and select the highest quality print option for optimal results.
Printing Tip:
To avoid smudging or smearing, allow the printed tape to dry completely before handling it.
5. Step 3: Preparing the Tape
Before applying the designs to the tape, make sure the surface is clean and free from any dust or debris. Gently wipe the tape with a clean cloth or tissue to remove any potential obstructions that could affect the adhesion of the ink.
Preparation Tip:
To ensure the longevity of your printable tape, consider using a tape dispenser or storing it in a cool, dry place away from direct sunlight.
6. Step 4: Applying the Designs to the Tape
Carefully peel off the backing from the printed tape, exposing the adhesive side. Align the designs with the desired placement on the tape and press them firmly onto the adhesive surface. Smooth out any air bubbles or wrinkles by gently applying pressure from the center towards the edges.
Application Tip:
For intricate designs, use a small tool like a bone folder or the edge of a credit card to ensure precise application.
7. Step 5: Drying and Storing Your Printable Tape
Allow the printed tape to dry completely before using or storing it. This will ensure that the ink sets properly and prevents any potential smudging. Once dry, roll or fold the tape carefully to avoid any damage, and store it in a safe place until you're ready to use it.
8. Creative Uses for Printable Tape
Now that you have your own printable tape, let's explore some creative ways to use it:
- Gift wrapping: Add a personal touch to your gifts by using your custom tape to seal the wrapping paper or embellish the package.
- Scrapbooking: Use your printable tape as decorative borders or to secure photos in your scrapbook.
- DIY crafts: Incorporate your unique tape designs into various craft projects, such as handmade cards, journals, or home décor.
- Party decorations: Create custom banners, signs, or labels using your printable tape for birthdays, weddings, or other special occasions.
- Branding and packaging: If you have a small business, you can use your printable tape to add a professional and personalized touch to your product packaging.
9. Frequently Asked Questions (FAQs)
Q1: Can I use any type of tape for printing?
Yes, but it is recommended to choose a transparent tape specifically designed for printing to ensure optimal quality and adhesion.
Q2: Can I use my own printer at home?
Yes, as long as your printer allows you to print on adhesive materials and accommodates the dimensions of the tape.
Q3: Can I use markers or pens to customize the printed tape further?
Absolutely! Use colored markers or pens to add additional details, highlights, or personal messages to your printed tape.
Q4: How long does it take for the printed tape to dry?
Drying time can vary depending on factors like ink type and humidity. It is best to allow the tape to dry for at least a few hours before handling it.
Q5: Can I remove the printed tape once applied?
While some tapes can be removed without leaving residue, others may adhere more firmly. It is recommended to test a small piece before applying the tape to a valuable item.
10. Conclusion
Congratulations! You now have the knowledge and skills to create your own printable tape. With this step-by-step guide, you can unleash your creativity and add a personal touch to various projects. Whether it's for gifts, crafts, or branding, your custom tape designs will undoubtedly make a lasting impression. Get started today and enjoy the endless possibilities of printable tape!
Related Blog
Nwes
Product List
Product Enquiry
 DONGGUAN HYSEAL CO., LTD
 Baolian Ind. Park, Gaobu,
Dongguan 523282,
Guangdong, China +86-769-81300836
 +86-769-81300830
 seven@hyseal.com
